My past two experiences working with Simply Stated designs has shown me that they consistently go above and beyond with customer service and collaboration to make each project uniquely tailored. They take the time to understand what the customer is looking for, and they provide out of the box ideas to help the process along. It’s definitely a fun journey to create one of a kind pieces. Simply Stated design is now my go-to for gifts!
- Ash
We LOVE our custom wood puzzle made by Simply Stated Designs!!! It has provided great quality family time and a lot of fun. As we put the puzzle together, we enjoyed finding the girls hair, hands, eyeballs, etc. The wood makes it a luxurious puzzle experience! Everything about the product is very high quality from the wood used, laser burnt edges, excellent print quality and the personalized box was a nice touch. Thank you!
- Amy
Working with Kim and Simply Stated Designs was a wonderful experience. I wanted something simple and fresh for the wall in our laundry room but didn’t have anything specific in mind. Kim was so helpful in sending me some ideas and designs and working with me until we came up with the one that was just right! I love it and the craftsmen’s ship and quality is beautiful! The whole experience was fun and easy from start to finish. I would 100% recommend Kim and her team!
- Melissa S.
I had a canvas picture made by Simply Stated Designs for a wedding gift. The picture was from their “save the date” picture. The photo was taken out doors in a sepia tone. The barn wood frame went beautifully with the picture. I was very surprised how quickly it was made. I am very pleased with the picture and the frame.
- Lynda
I recently received a beautiful sign from Simply Stated Designs and have to say how blown away I am! The shipping was quick and the sign was packaged properly to ensure no damage. The sign itself (gather) is beautiful!!! So simple – it completes my space perfectly. The frame is also well made and sturdy. I love everything about my new “gather” sign. I will be back for more and will let all my friends know. Thank you Kim & team!!
- Kimbra
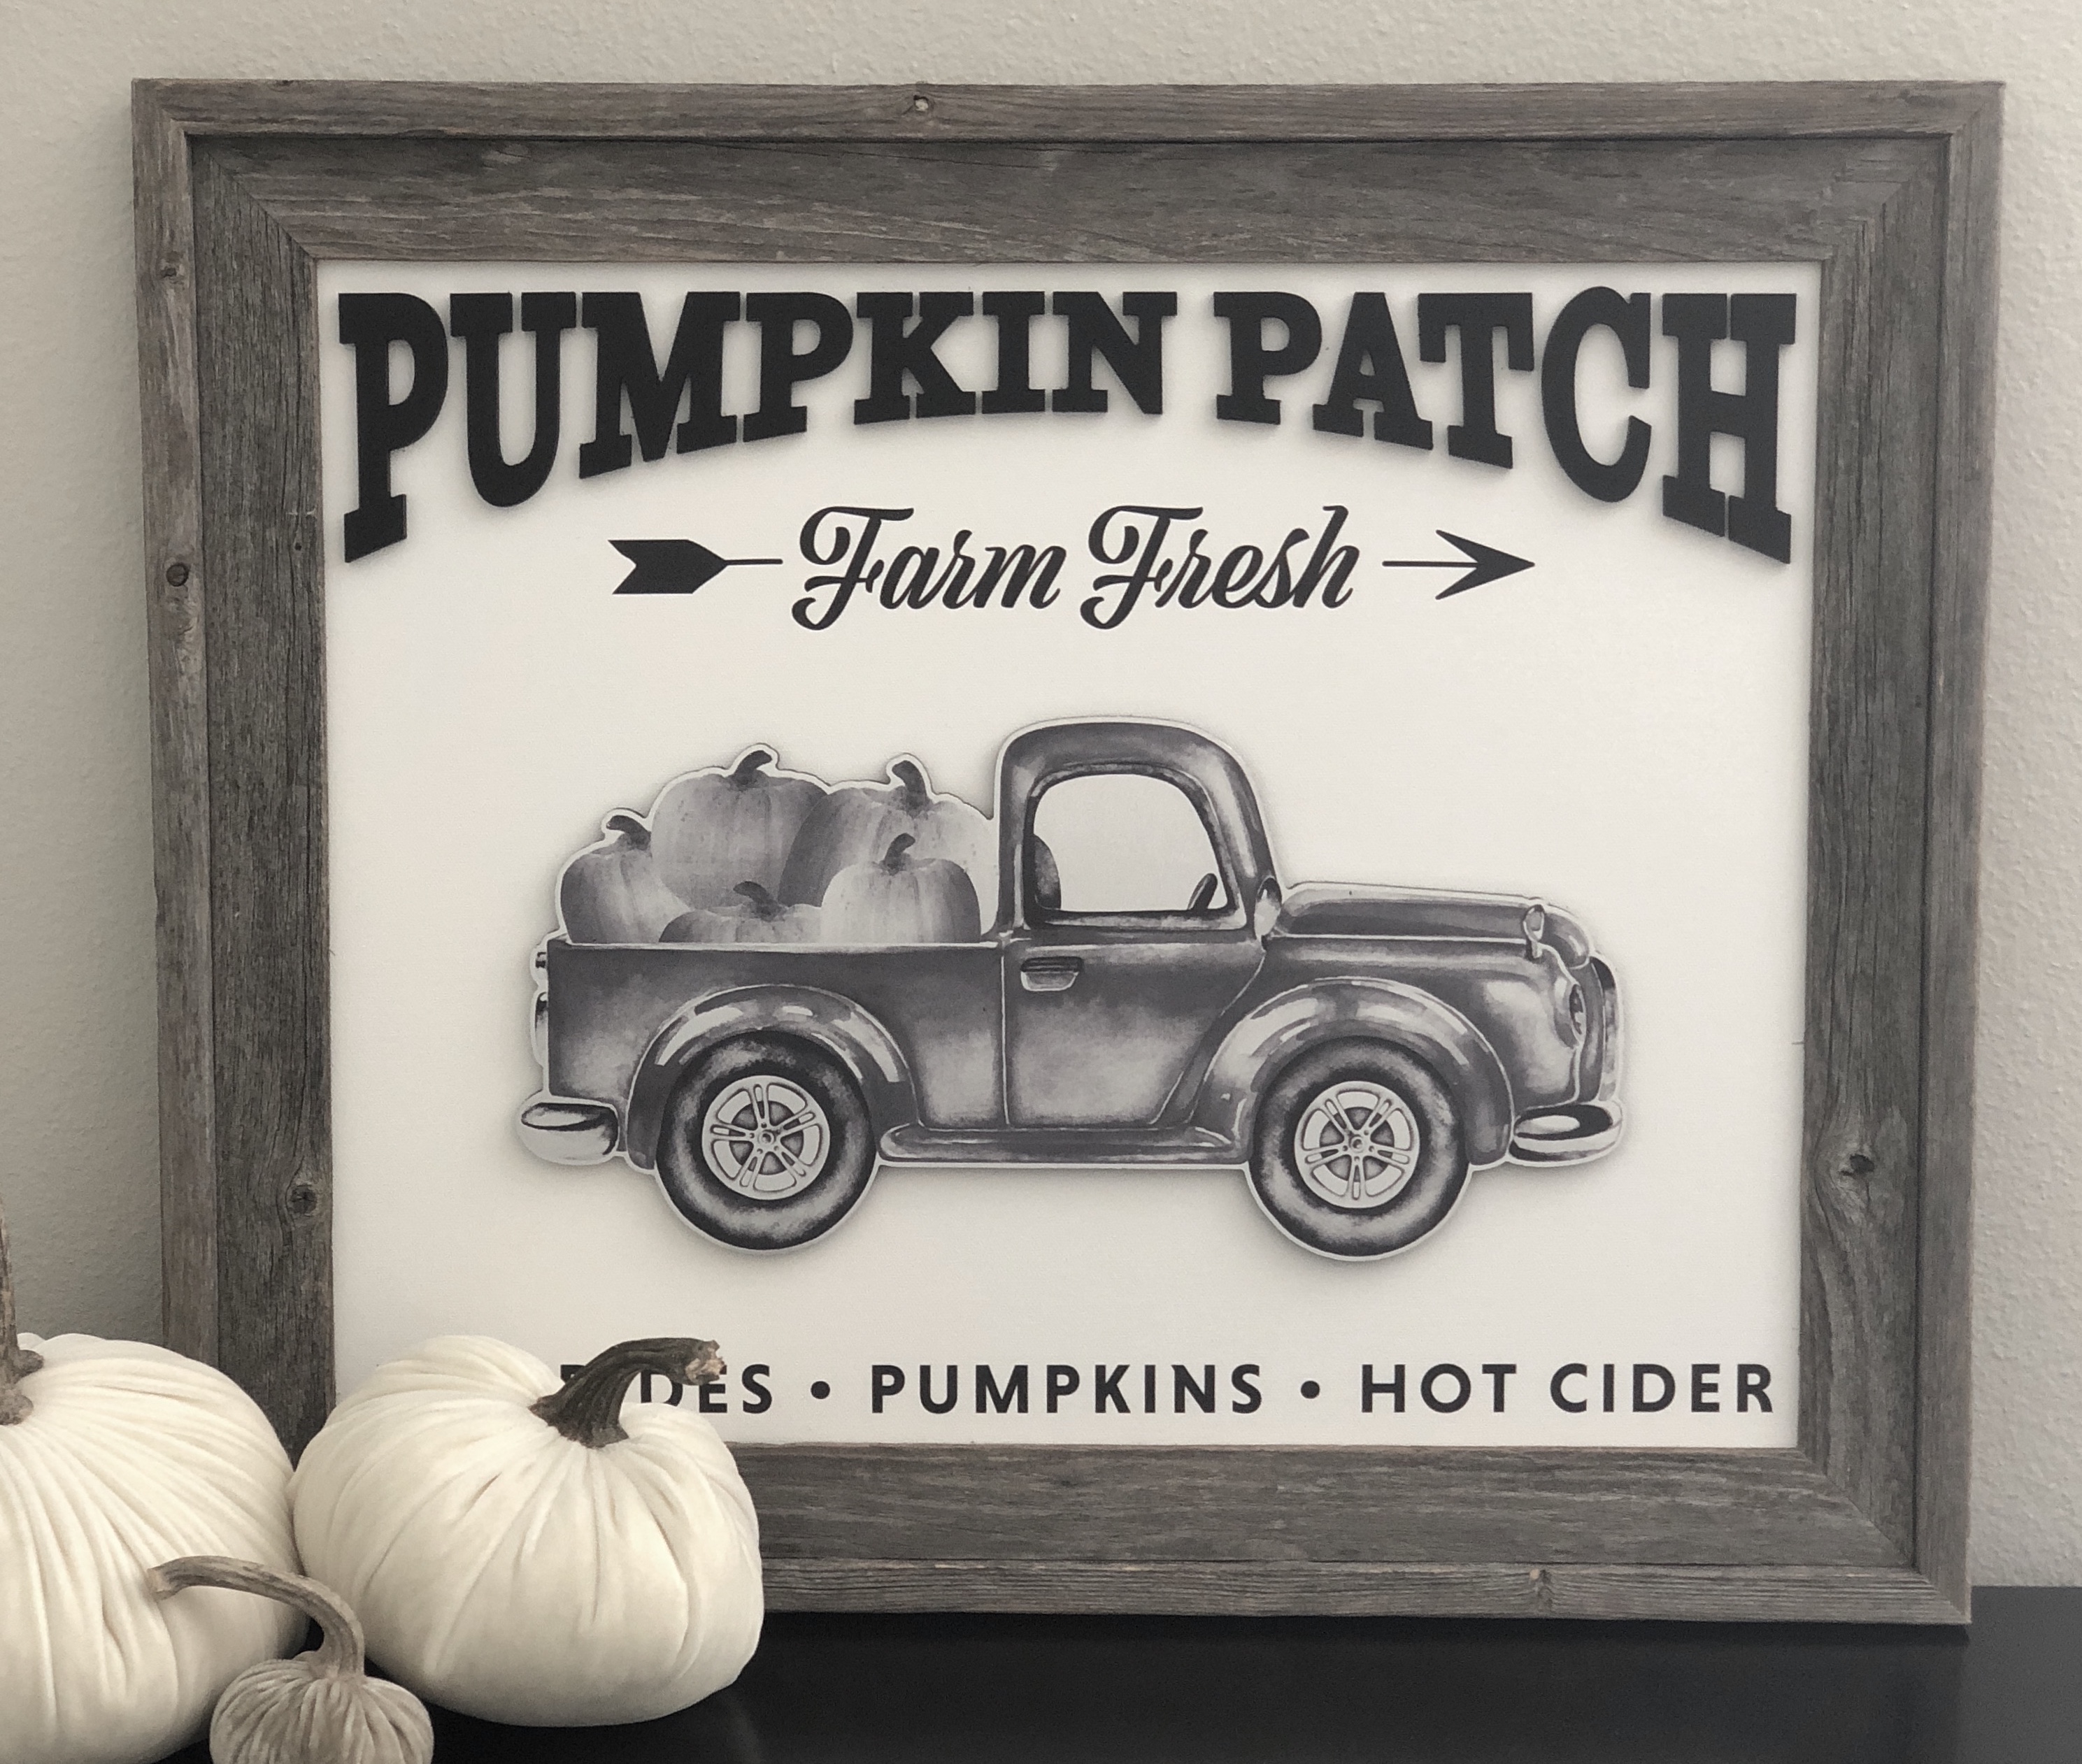
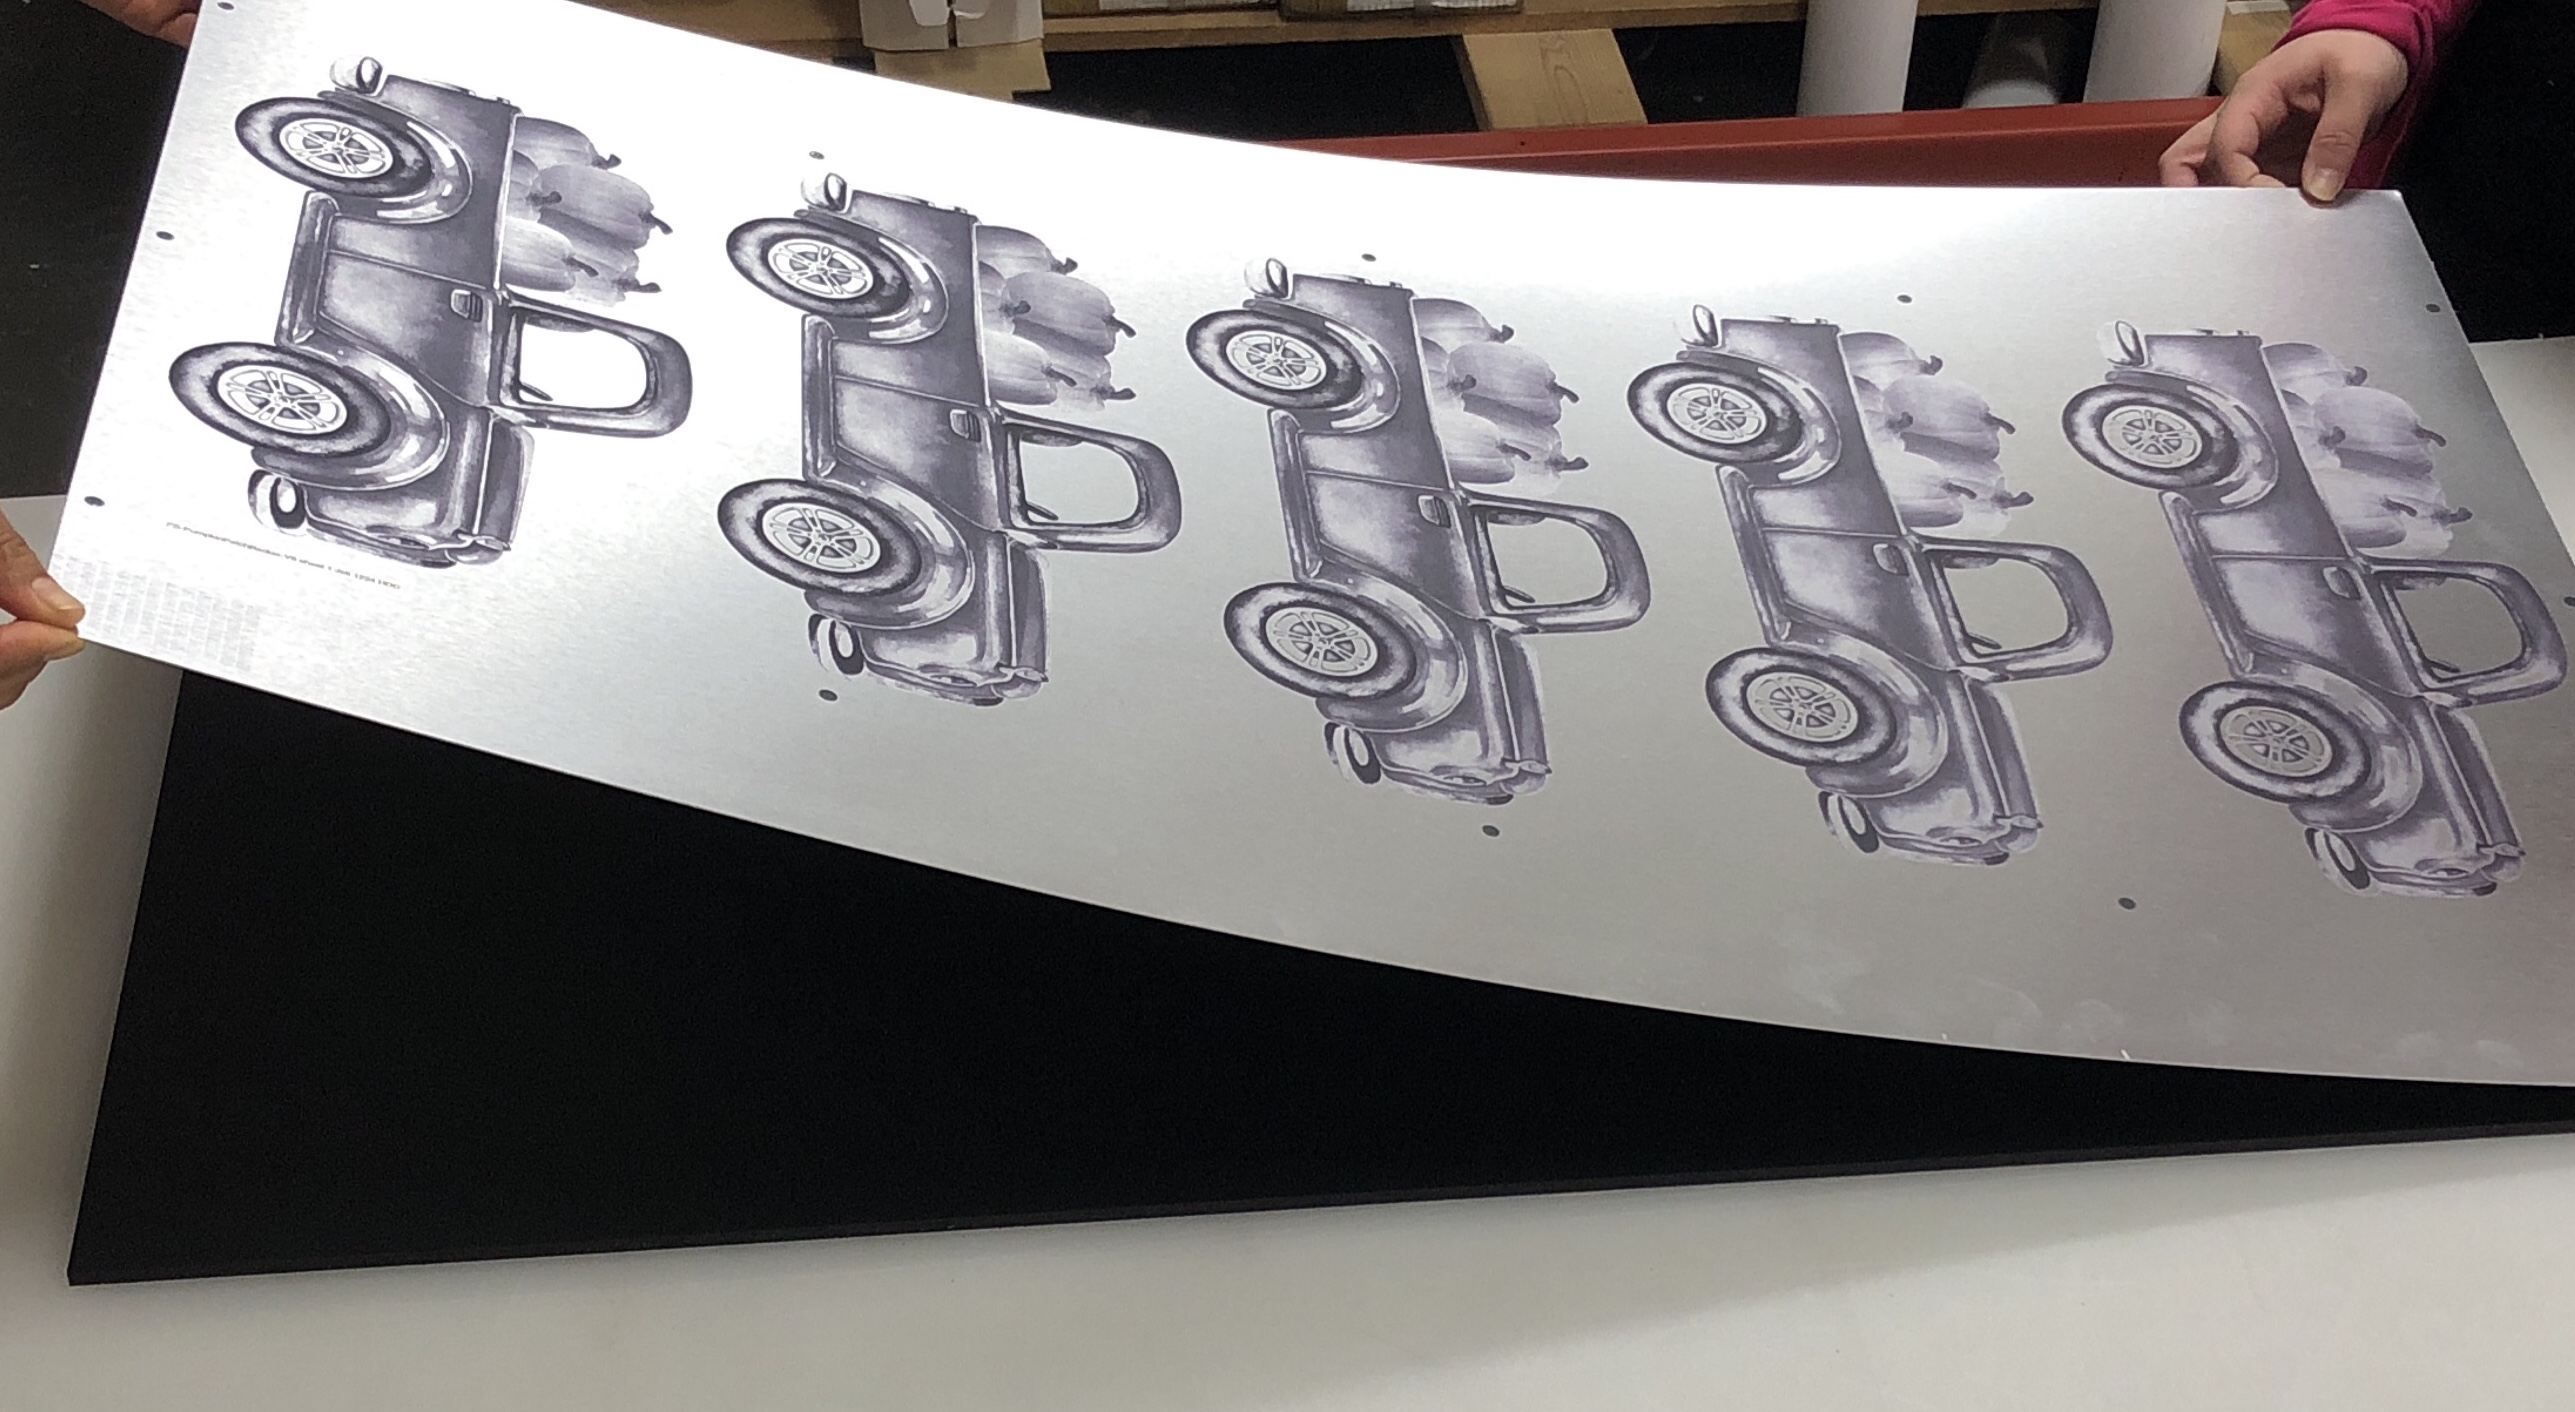
The “Christmas Tree Farm” sign is everything I imagined and more. I loved the pictures of it online, but in person, it far exceeded my expectations. The quality and craftsmanship of the frame, printing, and especially the 3D etched metal truck is remarkable. I can’t wait to order more products from Simply Stated Designs!
- Allison
I’ve purchased three (3) custom signs from Simply Stated Designs and love them all. Kim worked with me on what I wanted and they turned out exactly as I imagined!! All three arrived in perfect condition and right on time. I will be ordering more!
- Stephanee
Thank you Kim & Simply Stated Designs team! My custom sign looks amazing in my office! It was so much fun working with you and your designer to make this simple quote become reality. The artwork your designer created captured the quote beautifully! I can’t wait for our next project!
- Lisa
I am really happy with how our mudroom turned out. The Simply Stated Designs pieces are what really pulled it all together! Thank you!
- Kyle
Let me start off by saying, I never write reviews… but in this case I was compelled to share this experience with whomever would listen. The customer service and resulting product that I received from Simply Stated Designs is something that is rare in today’s business world. Ritz Carlton could take a page out of this company’s book. I came to them with concept of what I wanted to create. They worked with me from start to finish with numerous suggestions, sample after sample and amazing creativity. The final product was incredible and beyond my conceptual expectations. They took an idea and brought it to life better than I had imagined. As I venture into building a new home, I know that I will have Simply Stated Designs along with me to create a home that will be a show piece with their designs. Thank you so much Kim and staff for doing what you do at a level that is best in class.
- Patrick N
Thank you so very much for the beautiful framed art of my sweet dog. The quality of the print as well as the craftsmanship of the frame are both exceptional. Thank you for creating such a special custom piece that I will treasure for many years to come. I highly recommend Simply Stated Designs!
- Marianne
Simply Stated Designs makes amazing creations and one of my favorite’s are their shoe tags. The process was simple, they gave me multiple design options and worked within my budget for a group of 45 volleyball players. The volleyball players are able to use their “PRIDE” and “FEARLESS” shoe tags on their shoe laces as an extra source of motivation and support, use them as a necklace, or even hang them by their bed as a reminder of their commitment to themselves and their teammates. I would highly recommend Simple Stated Designs for a quality product and local family company you can trust.
- Karis
We are so pleased with the custom sign made by Simply Stated Designs! We were able to send over an idea and they made it into something so special for us and our home. Thank you!!
- Alex & Corey
For anyone that hasn’t worked with Simply Stated Designs, you’re in for a treat! 10 star service – imagination the ability create exactly what you want! Thanks Kim and crew!
- Patrick
Working with Kim at Simply Stated Designs was a fun and efficient process! I wanted to surprise my friend with a custom sign for her new woman cave, but I didn’t have a specific design in my mind. Kim asked me a few questions about my friend, her personal style, and where the sign would likely be placed. From there, the team pulled together several amazing design ideas for me choose from and incorperated special custom touches as well. The team suggested drilling holes in the top to make hanging it easier. They thought of everything and I had the sign just two weeks later! My friend absolutely loved it, and I loved how proud she was of the perfectly personal statement! Thank you Simply Stated Designs for making people feel great about their favorite spaces!
- Kelli
I recently had Simply Stated Designs create a decal for a project I was working on. I had a rough idea of what I wanted and they worked with me to come up with the perfect design. I was so pleased at how conscientious and precise they were about the details from color to font to layout to size, making improvements as we worked together. I will use them for every project! Thank you Simply Stated Designs!
- Phyllis
After a recent remodel we had a large wall in our dining room that I was looking for the perfect piece to fill that space. I found a saying that I loved and took it to Simply Stated Designs to see if they could make me a sign with the quote. I didn’t know what font or layout I wanted so they came back to me with suggestions and multiple options to choose from. Their suggestions were great. We made a couple changes to the first proof and the next came back very quickly. The sign turned out even better than I had envisioned! Simply Stated Designs was very easy to work with. I would highly recommend them to anyone looking for a special piece for their home or to anyone looking for a unique gift.
- Ericka
I would highly recommend Simply Stated Designs to anyone looking for a gift for clients, friends, family, etc. I recently ordered a couple client gifts and the process couldn’t have gone any smoother. Kim and the Simply Stated team were great to work with. They were willing to be flexible on customization of the items, they communicated with me throughout, the order was processed and shipped in a timely manner and the finished product turned out great. I was thoroughly impressed with the customer service through the entire process, and will definitely be ordering again in the future.
- Tim
Simply Stated Designs created two pieces for me, a “gather” sign and a “welcome” sign. Both pieces are beautifully designed with close attention to every detail. The quality is impeccable, both pieces are prominently displayed in our home and elicit compliments from everyone who sees them. The timeliness and communication from Kim and her team were excellent and the service was truly exceptional. Thank you so much for creating stylish, elegant, and modern pieces that have added so much to our home.
- Tiffany